
Egyptian Chicken Pane has become a staple in Egyptian homes over the last twenty years. People love it as a weekly dinner, and honestly, it’s not hard to see why.
This crispy, breaded chicken feels a bit like Austrian schnitzel, but Egyptian seasonings and methods give it a totally different personality.
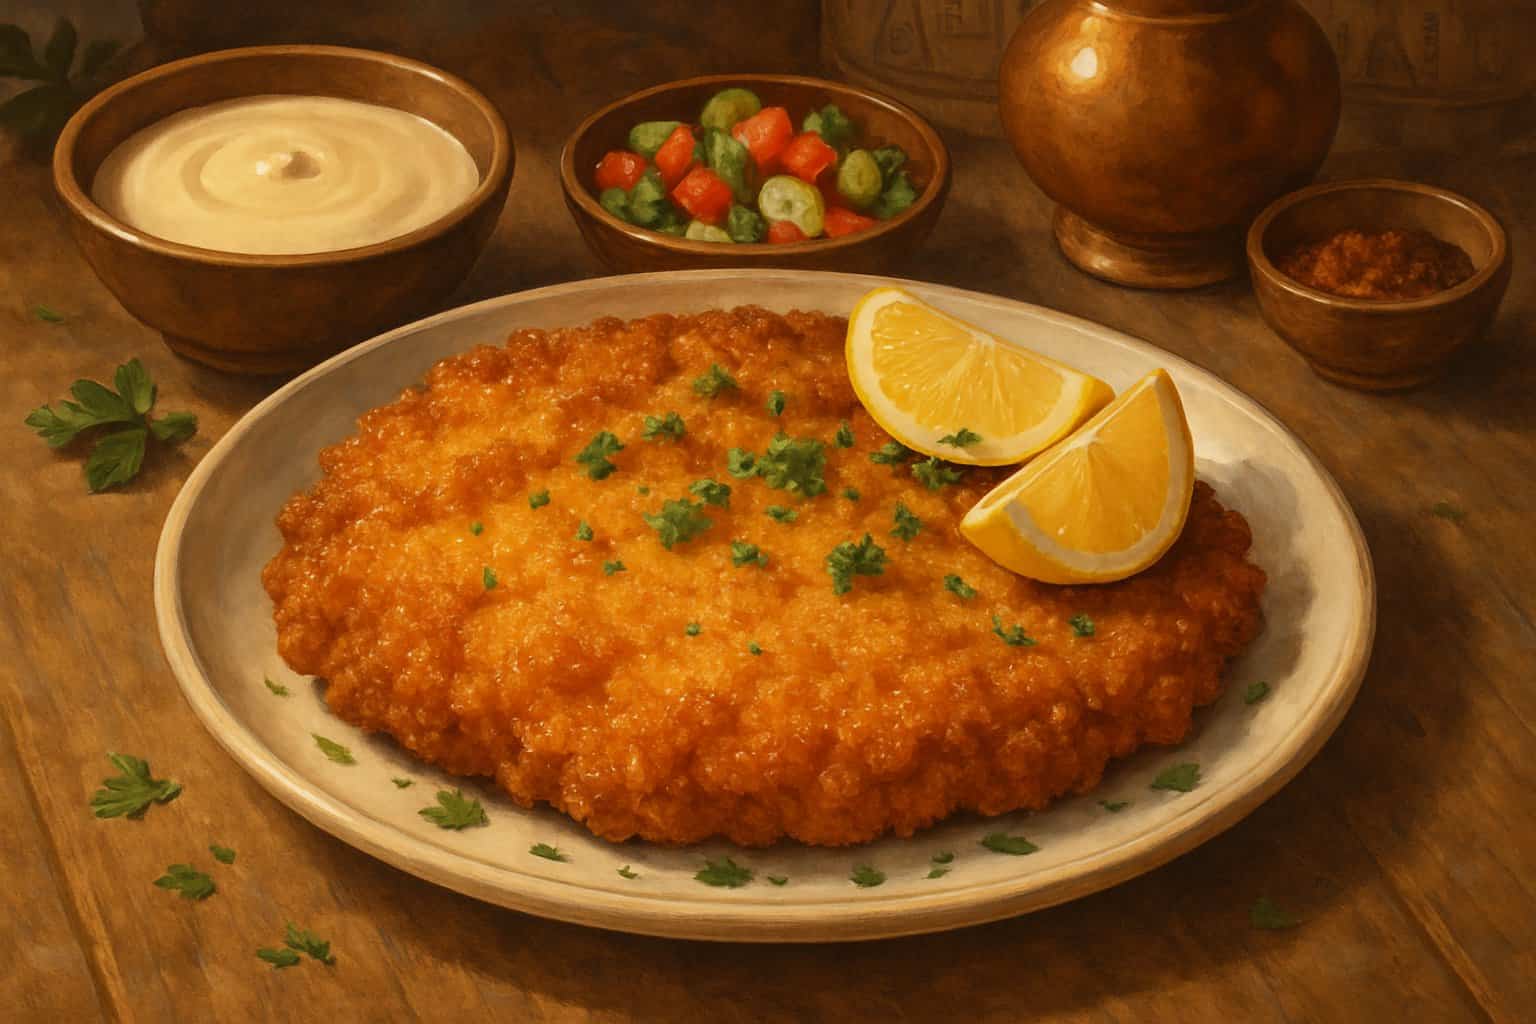
The secret to real Egyptian Chicken Pane is in the marinade—a mix of onion juice, yogurt, and spices that keeps the meat tender and juicy under a golden, crunchy shell. Unlike schnitzel, Pane sits in the marinade longer and uses a specific breading approach to make sure the crust sticks during frying.
It’s a great way to get restaurant-style results at home without spending a fortune or hunting for fancy ingredients.
If you know how to marinate, bread, and fry chicken just right, you can turn simple chicken breasts into something way more exciting. The right seasonings, a solid breading method, and careful frying give you that juicy inside and crispy outside everyone wants.
Key Takeaways
- Egyptian Chicken Pane uses a marinade with onion juice and yogurt for authentic flavor and tenderness.
- The breading process has three stages and needs fridge time for a crispy coating that actually sticks.
- You’ve got to watch your oil temperature and frying style if you want that golden, crunchy finish without drying out the chicken.
What Is Chicken Pane and How Does It Differ from Schnitzel?
Chicken pane is Egypt’s take on breaded chicken. It borrows from European schnitzel, but Egyptian flavors and techniques make it something else entirely.
French culinary traditions blend with Egyptian cooking to create this comfort food. It’s a little bit of culinary history on a plate.
Defining Chicken Pane
Chicken pane starts with thin chicken breast cutlets. They get marinated, breaded, and fried until golden and crisp.
The name comes from the French word for breadcrumbs, a little nod to Egypt’s colonial past.
Key steps:
- Slice boneless chicken breast into thin pieces.
- Marinate overnight with onions, garlic, salt, and pepper.
- Coat in seasoned breadcrumbs (sometimes mixed with panko).
- Pan-fry in oil until crisp and golden.
That overnight soak? It’s what makes chicken pane so juicy and flavorful. Egyptian cooks usually season the breadcrumbs with paprika, oregano, onion salt, and garlic powder.
Sometimes, they skip flour and egg and just go straight to breadcrumbs. It’s a flexible dish—people make it their own.
Comparison to Classic Chicken Schnitzel
Traditional chicken schnitzel relies on a three-step coating: flour, egg, then breadcrumbs. Wiener schnitzel uses veal, but swapping in chicken is common.
Main differences:
| Aspect | Chicken Pane | Chicken Schnitzel |
|---|---|---|
| Marination | Overnight with aromatics | Usually none |
| Coating | Often breadcrumbs only | Flour, egg, breadcrumbs |
| Seasonings | Middle Eastern spices | Simple salt and pepper |
| Texture | Softer crunch | Thicker, crispier crust |
Chicken pane comes out more tender and zesty, thanks to the marinade. Schnitzel tends to be crunchier, with a thicker crust.
Both dishes mean pounding chicken thin and frying it up, but schnitzel usually sticks to the three-step breading for that extra-thick layer.
French and Austrian Influences
Napoleon’s French occupation brought European kitchen habits to Egypt. Austrian schnitzel traditions also made their way into the Mediterranean.
French cooks introduced a more systematic way to bread proteins. Even the word “pane” is straight out of French cooking.
Egyptian cooks took those techniques and ran with them, adding local spices and giving the marinade more time to work its magic.
That cultural mashup led to a dish that’s part European, part Egyptian, and all comfort food. It’s a pretty neat example of culinary evolution.
Serving Traditions in Egypt
Egyptian families serve chicken pane for comfort and nostalgia. It pops up at regular dinners and special gatherings alike.
Cooks often make smaller strips for kids—homemade chicken nuggets with the same seasoned breadcrumbs. It’s a hit with everyone, honestly.
You’ll usually see it paired with rice, veggies, or Egyptian flatbread. Sides and salads round out the meal.
Restaurants in Egypt almost always have chicken pane on the menu. It’s familiar, easy to love, and a go-to for locals and visitors wanting a taste of home.
Historical Origins of Chicken Pane
Chicken Pane comes from a blend of French colonial influence and old-school European breaded cutlets. It’s basically a riff on Austrian schnitzel, but with a local Egyptian spin.
French Influence on Egyptian Cuisine
French cooking traditions landed in Egypt during the 1800s and early 1900s, thanks to colonial ties and cultural exchange. The French brought the idea of pané—meaning “breaded”—to Egyptian kitchens.
Egyptian cooks didn’t just copy the French. They tweaked the breading to fit their own tastes, adding Middle Eastern spices and seasonings.
French influence also meant more organized cooking: prepping meat right, coating it well, and frying it just so.
Local cooks started using onions, yogurt, and Egyptian spices in the marinade. That’s where the dish really took on its own identity.
Austrian and Wiener Schnitzel Roots
Schnitzel began in Austria as a thin, breaded, pan-fried cutlet—usually veal for the classic Wiener schnitzel.
Austrians would pound the meat thin and then use flour, egg, and breadcrumbs for that signature crunch.
European travelers and immigrants brought schnitzel know-how to Egypt in the late 1800s. Local cooks adapted those methods to what they had on hand.
Egyptians gave the marinade more time and added bolder spices compared to the simple Austrian style.
Instead of just salt and pepper, Egyptians used garlic powder, onion juice, and yogurt. It’s a small change, but it really shifts the flavor.
Emergence in Egyptian Households
Chicken Pane took off in Egyptian homes about twenty years ago. It offered families an affordable meal that kept things interesting.
Moms loved it because the recipe was simple and didn’t call for expensive ingredients. Anyone could learn to make it.
It quickly became a weekly favorite. The crispy breaded chicken made both kids and adults happy.
Over time, cooks personalized the marinade—onion juice, yogurt, and vinegar became common for that Middle Eastern punch.
The recipe spread mostly by word of mouth. Families taught each other, and soon Chicken Pane was everywhere—an Egyptian classic with a global backstory.
Essential Ingredients for Authentic Chicken Pane
Real Egyptian chicken pane depends on specific ingredients for its crisp crust and tender inside. The marinade uses yogurt, spices, and onion juice, while the coating involves flour, eggs, and breadcrumbs.
Chicken Selection and Preparation
Chicken breasts are the go-to here. Medium-sized ones—around 6-8 ounces—work best.
Slice them into cutlets about half an inch thick. That way, they cook evenly and soak up more marinade.
Give them a light pounding for even thickness. It helps avoid tough or undercooked spots.
Fresh chicken really does make a difference. Look for firm, pink meat with no odd smell.
Trim off any extra fat or bits before slicing. A cleaner cut means better breading and a nicer look on the plate.
Choosing the Right Breadcrumbs
Bread crumbs are essential for the signature crunch. Fresh is better than store-bought.
You can make your own by pulsing day-old white bread—no crusts—in the food processor. Aim for a fine, not dusty, texture.
Panko breadcrumbs are a good alternative. They’re flakier and give an extra crispy bite.
Skip flavored breadcrumbs—they’ll mess with the marinade’s spices. Plain is best if you want that Egyptian taste to come through.
Homemade breadcrumbs keep in the fridge for about a week, or you can freeze them for longer.
Key Spices and Flavorings
The marinade is what really sets Egyptian chicken pane apart. Garlic powder and onion powder are the backbone.
You’ll need:
- Garlic powder (1 tablespoon per kilo of chicken)
- Onion powder (1 tablespoon)
- Ginger powder (1 teaspoon)
- Salt and pepper to taste
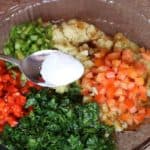
Fresh onion juice adds moisture and a deeper flavor. Just grate a fresh onion, then squeeze out the juice and toss the pulp.
Yogurt makes the meat tender and adds a little tang. Plain Greek yogurt is ideal.
Lemon juice and white vinegar brighten things up and help break down tough spots in the chicken.
Oil Options for Frying
Oil choice matters for flavor and texture. Neutral oils work best.
Vegetable oil is a solid pick—it won’t overpower the spices and heats well.
Sunflower oil is another good option. It handles high heat and has a light flavor.
Use enough oil to cover the bottom of each cutlet. Shallow frying works better than deep frying here.
Heat the oil to 350°F before you start. That gives you a crisp crust without making the chicken greasy.
Skip olive oil for frying—it burns too easily. Save it for salads or finishing touches.
Kitchen Tools and Preparation Tips
Having the right tools and a tidy setup makes the difference between soggy chicken and crispy Egyptian pane. It’s all about prepping the meat and organizing your breading station.
Using a Meat Mallet and Plastic Wrap
A meat mallet is your best friend for getting those chicken cutlets nice and thin. Place each chicken breast between two sheets of plastic wrap before pounding.
That keeps the meat from sticking and your counter from getting messy.
How to pound the chicken:
- Start in the center and work out.
- Use gentle, even taps.
- Aim for 1/4 to 1/2 inch thick.
- Try to keep the thickness even.
Plastic wrap isn’t just for cleanliness—it also stops the chicken from tearing and keeps it moist while you work. Go for heavy-duty wrap if you can.
No meat mallet? A rolling pin or heavy skillet will do in a pinch. The goal is even thickness, so the chicken cooks and soaks up flavor the same all the way through.
Setting Up the Breading Station
A well-organized breading station keeps things tidy and makes the coating process way less chaotic. You’ll want three shallow dishes set up in a row: one for flour mixed with starch, one for beaten eggs and milk, and one for breadcrumbs.
Essential station setup:
- Dish 1: All-purpose flour combined with 2 tablespoons starch
- Dish 2: Beaten eggs mixed with 1/4 cup milk
- Dish 3: Fine breadcrumbs or panko
Keep one hand dry for the flour and raw chicken, and use your other hand for the eggs. This little trick keeps your fingers from turning into a gluey mess.
Have some paper towels close by for quick wipe-downs. Set out a clean plate for the breaded pieces before they hit the fridge.
Chilling the chicken for 30 minutes helps the coating stick better once you fry.
Step-by-Step Chicken Pane Recipe
This recipe gives you tender chicken with a golden, crispy crust thanks to marination and a three-step breading. You can pan-fry it for the classic version or bake it if you want something lighter.
Pounding and Marinating the Chicken
Start with boneless, skinless chicken breasts. Slice each breast in half horizontally so you get thinner pieces.
If they’re still a bit thick, gently pound them with a meat mallet to about 1/2 inch. Toss the chicken in a bowl with sliced onions, minced garlic, salt, and black pepper.
Make sure the marinade covers every piece. Let it marinate for at least 2 hours—overnight is even better if you can wait.
The onions and garlic break down the chicken a bit, making it juicier and more flavorful.
Breading: Flour, Egg, and Breadcrumb Coating
Set up three shallow bowls for the breading. The first bowl gets flour, seasoned with salt and pepper.
Bowl setup:
- Bowl 1: Seasoned flour
- Bowl 2: Beaten eggs with 2 tablespoons water
- Bowl 3: Breadcrumb mixture
Mix panko with regular breadcrumbs for extra crunch. Toss in paprika, oregano, onion salt, garlic powder, salt, and pepper.
Dredge each piece in flour, then dip in egg wash, then coat with breadcrumbs. Press the crumbs on gently so they stick.
A deep bowl for the breadcrumbs makes tossing the chicken around a lot easier.
Frying for a Crispy Coating
Pour oil into a large frying pan—enough to cover the bottom of each chicken piece. Medium heat works best.
Mediterranean oil blends are tasty, but plain vegetable oil does the trick too. Test the oil with a breadcrumb; it should sizzle right away.
Fry each chicken piece for 3-4 minutes per side until golden and crisp. Try not to crowd the pan, or the oil cools down too much.
After frying, set the chicken on paper towels to soak up extra oil. You want the inside to hit 165°F.
Oven-Baked Chicken Pane Variation
Preheat the oven to 400°F. Line a baking sheet with foil and brush it with oil.
Follow the same marinating and breading steps as before. Lay the breaded chicken out on the sheet and brush the tops with a little oil.
Bake for 15-20 minutes, then flip the chicken. Bake another 10-15 minutes until everything’s golden and cooked through.
You’ll get a lighter version with less oil. The coating isn’t quite as crunchy as fried, but it’s still satisfying.
Secrets to the Perfect Crispy Coating
Getting that perfect crunch comes down to chilling, oil temperature, and draining. These steps really make a difference.
Chilling the Breaded Chicken
Chill the breaded chicken before frying. This helps the coating stick better and not fall off in the pan.
Place the pieces on a wire rack over a baking sheet. Pop them in the fridge for at least 30 minutes.
Some folks chill for up to 2 hours for even better results. Cold chicken goes into hot oil and the coating stays put.
Panko breadcrumbs are great here—their big flakes grab onto the chicken nicely.
If you’re chilling for more than an hour, cover the chicken loosely with plastic wrap so it doesn’t dry out.
Choosing the Best Oil Temperature
Oil temperature can make or break the coating. Too hot and you burn the outside, too cool and you get soggy chicken.
Heat oil to 350°F (175°C). Use a thermometer if you have one. Or just drop in a bit of bread—it should sizzle and turn golden in about a minute.
Vegetable, peanut, or canola oil all work well. They handle high heat and don’t add weird flavors.
Add chicken slowly so you don’t drop the oil temp too much.
Draining and Resting After Frying
Drain fried chicken on a wire rack right after cooking. This lets air flow and keeps the coating crisp.
Paper towels soak up oil but can trap steam underneath, making things soggy. The wire rack is just better.
Let the chicken rest for 3-5 minutes before serving. This gives extra oil time to drip off and the coating to set.
Keep the pieces separate while resting. If you stack them, steam softens the crust.
For even more crunch, put the rack over a baking sheet in a 200°F oven. The chicken stays warm and crispy.
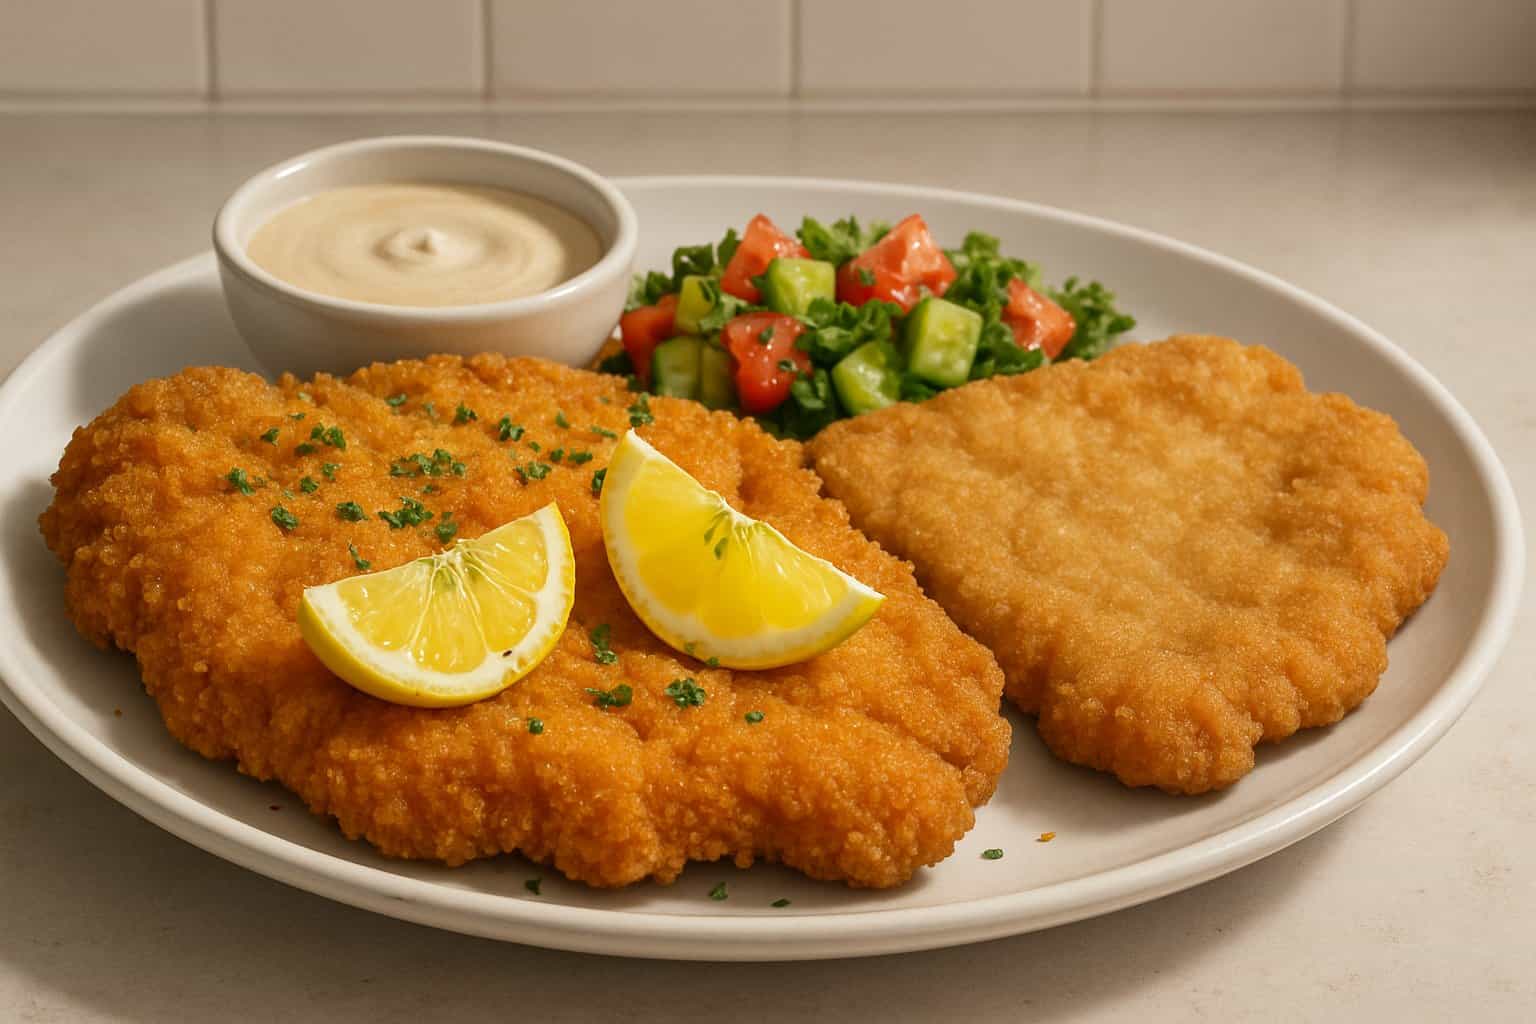
Serving Suggestions and Popular Pairings
Chicken pane goes great with classic Egyptian sides like rice and veggies. The crispy texture also makes it perfect for sandwiches.
Leftovers? You can turn them into salads, wraps, or easy meals all week.
Traditional Side Dishes
Egyptian families usually serve chicken pane with white rice and a simple salad. The rice soaks up extra flavor and balances out the fried coating.
Popular Egyptian sides include:
- Vermicelli rice (rice cooked with thin pasta)
- Cucumber and tomato salad with lemon dressing
- Pickled vegetables (turshi)
- Egyptian flatbread (baladi bread)
Roasted veggies like potatoes, carrots, or green beans add color and nutrition. Mashed potatoes also work—creamy meets crunchy, always a win.
Some people serve it with coleslaw for a fresh crunch. Others go for steamed broccoli or cauliflower to lighten things up.
Making Chicken Pane Sandwiches
Chicken pane makes killer sandwiches in pita or regular rolls. The crispy coating stands up to bread and toppings.
Common sandwich additions:
- Lettuce and tomatoes
- Pickles or cucumber slices
- Garlic sauce or tahini
- French fries (super popular in Egypt)
Slicing the chicken into strips makes sandwiches easier to eat, especially for kids.
Pita pockets are the classic way to serve chicken pane sandwiches. The bread stays soft and the chicken stays crisp.
Some folks add cheese or mayo, but others keep it simple with veggies and sauce.
Incorporating Leftovers
Leftover chicken pane keeps in the fridge for 2-3 days. Reheat in the oven to get some crunch back.
Ways to use leftovers:
- Chop into salads for extra protein
- Make wraps with veggies and sauce
- Add to pasta dishes
- Use in rice bowls
Cold chicken pane works for lunch boxes or picnics. The coating stays firm even when cold.
Slice leftovers thin for quick sandwiches. It stretches the meal and gives you new textures.
Chopped chicken pane also works in fried rice or tossed with pasta. Good way to reinvent yesterday’s dinner.
Variations, Modern Twists, and Storage
Chicken pane is super flexible. You can play with spices, try healthier cooking methods, and store it for later without losing that signature crunch.
Spice and Herb Variations
Traditional Egyptian chicken pane gets a boost from fresh herbs and spices. Parsley in the breadcrumbs or as a garnish adds a nice pop—fresh is definitely better than dried here.
Oregano gives it a Mediterranean vibe. Add about a teaspoon of dried oregano to the flour for an herby kick.
Paprika brings color and a gentle heat. Sweet paprika is mild and pretty, while smoked paprika gives a deeper flavor.
Other fun twists:
- Garlic powder and onion powder in the breadcrumbs
- Cumin and coriander for a Middle Eastern touch
- Italian seasoning blend mixed with the crumbs
- Cayenne pepper if you want some heat
Mixing herbs into the breadcrumbs spreads the flavor evenly.
Healthier Adjustments
Baking is the go-to for a healthier option. Preheat to 400°F, put breaded chicken on a wire rack over a baking sheet, and bake. You use less oil but still get crispiness.
Air fryers are awesome for this—cook at 380°F for 12-15 minutes, flipping halfway. A quick spray of oil helps with browning.
Panko breadcrumbs make a lighter, crunchier crust and soak up less oil.
Swap in whole wheat flour for more fiber. The taste barely changes, but the nutrition goes up. Almond flour works if you need gluten-free.
Greek yogurt in the marinade is a smart swap. It tenderizes the chicken and adds probiotics, with fewer calories than regular dairy.
Storing and Reheating Leftovers
Chicken pane keeps in the fridge for 3-4 days. Wrap pieces in foil or seal in containers to keep them from drying out.
For longer storage, freeze cooked chicken pane up to 3 months. Freeze pieces on a baking sheet first, then pop them in freezer bags so they don’t stick together.
Reheating methods:
- Oven: 350°F for 10-12 minutes
- Air fryer: 350°F for 5-7 minutes
- Skillet: Medium heat, 3-4 minutes per side
Avoid the microwave—it’ll make the coating soggy. The oven is best for crispiness, especially if you use a wire rack.
You can prep raw breaded chicken ahead and keep it in the fridge for up to 24 hours. This actually helps the coating stick better during frying.
Frequently Asked Questions
Here are some common questions about making real Egyptian chicken pane, from traditional marinade ingredients to breading tips. Getting these details right makes all the difference.
What are the key ingredients for an authentic Egyptian chicken pane marinade?
The real deal uses garlic powder, onion powder, and ginger powder as the base. Lemon juice and white vinegar add acidity and help tenderize the chicken.
Onion juice gives a unique flavor. Just grate fresh onions and squeeze out the liquid.
Yogurt pulls it all together, helping the flavors soak in. Let the chicken sit in the marinade for at least two hours in the fridge.
Finish with salt and black pepper. This combo gives chicken pane its signature taste—totally different from other schnitzels.
How do you achieve a crispy coating when making chicken pane?
The secret is the three-step coating. First, dust the marinated chicken in flour mixed with starch.
Next, dip it in beaten eggs mixed with milk and seasonings. The milk smooths out the egg wash so it sticks better.
Finally, press the chicken into breadcrumbs—don’t be shy about pressing firmly.
Chill the coated chicken for 30 minutes before frying. This helps the breading stay on and not fall apart in the pan.
What is the history behind the dish known as chicken pane?
Egyptian chicken pane showed up on Egyptian tables about 20 years ago. People loved how easy it was to make and how it didn’t break the bank.
The recipe is Egypt’s spin on the schnitzel idea, but with its own twist. Egyptian cooks started using a seasoning blend that stands out from what you’d find elsewhere.
A lot of countries have their own breaded chicken cutlets. The Egyptian version really leans into a complex flavor profile, thanks to local spice preferences.
Which type of breading is traditionally used in the preparation of chicken pane?
Traditional Egyptian chicken pane sticks with regular breadcrumbs—not panko or fancy coatings. That’s what gives it the crispiness everyone expects.
Some people make their own breadcrumbs from day-old bread, which lets them control the texture. It’s a bit more work, but honestly, worth it if you’re picky about crunch.
Dry, fine breadcrumbs fry up best. If they’re too wet or coarse, you just don’t get that classic crunch.
Store-bought breadcrumbs can be a lifesaver when you’re short on time. Just make sure they’re not stale, or you’ll end up with a disappointing crust.
What are some essential tips for seasoning chicken schnitzel to enhance its flavor?
The marinade does most of the heavy lifting when it comes to flavor. Egyptian chicken pane usually skips fresh herbs and uses powdered spices instead.
If you go overboard with lemon juice or vinegar, the chicken gets tough. Not enough, and it won’t tenderize—finding that sweet spot takes a little practice.
Mix the yogurt until it’s totally smooth before adding anything else. Lumpy yogurt just makes the flavor patchy, and nobody wants that.
Before you bread the chicken, wipe off the extra marinade. Leave a light coating for flavor, but too much will make the crust soggy.
Can you describe the typical cooking method for a traditional Egyptian chicken stew?
This question seems to mix things up a bit, since Egyptian chicken pane isn’t actually a stew. It’s more like a breaded, fried cutlet—think schnitzel, but with an Egyptian twist.
To make chicken pane, you pan-fry it in hot oil. First, heat up plenty of oil in a frying pan.
Once the oil’s hot, add the breaded chicken pieces. Right after you drop them in, turn the heat down.
That way, the coating won’t burn before the chicken cooks through. Each side needs about two minutes.
You’ll know it’s ready when the chicken turns golden brown and the breading feels crispy.
Related posts:
 Kebda Iskandarani – Alexandrian liver Sandwich with Tahini Sauce
 Egyptian Green Salad -Salata Baladi
 Alexandrian-Style Ful Medames: How to Make Spicy Foul Iskandarani
 Authentic Basbousa Recipe (Egyptian Semolina Cake) with Sweet Syrup Tips: A Complete Guide
 5 Iconic Egyptian Street Foods to Try (and How to Make Them at Home)


